Showing posts with label Xp. Show all posts

Friday, February 13, 2009

How to Perform a Windows XP Repair Install .......

0 comments
XP REPAIR INSTALL.....


1
. Boot the computer using the XP CD. You may need to change the
boot order in the system BIOS. Check your system documentation
for steps to access the BIOS and change the boot order.

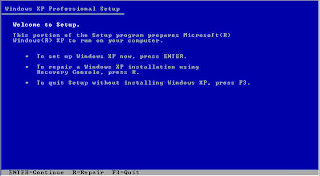
2. When you see the "Welcome To Setup" screen, you will see the
options below This portion of the Setup program prepares Microsoft
Windows XP to run on your computer:

To setup Windows XP now, press ENTER.

To repair a Windows XP installation using Recovery Console, press R.

To quit Setup without installing Windows XP, press F3.

3. Press Enter first to start the Windows Setup.
not choose "To repair a Windows XP installation using the
Recovery Console, press R", (you do not want to load Recovery
Console). I repeat, do not choose "To repair a Windows XP
installation using the Recovery Console, press R".

4. Accept the License Agreement and Windows will search for existing
Windows installations.

5. Select the XP installation you want to repair from the list and
press R to start the repair.

6. Setup will copy the necessary files to the hard drive and reboot.
Do not press any key to boot from CD when the message appears.
will continue as if it were doing a clean install, but your
applications and settings will remain intact.

7. Reapply updates or service packs applied since initial Windows XP
installation. Please note that a Repair Install using an Original
pre service pack 1 or 2 XP CD used as the install media will remove
SP1/SP2 respectively and service packs plus updates isssued after the
service packs will need to be reapplied.


NOTE : :

During This You may Encounter some warnings ,such like this : :

1: Should you do a repair install and is it the best choice?

2: If the Repair Option is not Available ..?


onethanx@aol.com

нσω тσ ƒιη∂ уσυя ωιη∂σωѕ χρ ρяσ∂υ¢т кєу ƒяσм тнє ωιη∂σωѕ χρ CD

0 comments
You don't have Xp key , But You have Xp cd....and Trying to get Xp key from Your friend , You no need to worry about the key.... This post gives You the solution To extract Xp key from Xp cd : :


This is worked on a XP Professional CD, but it should work for the Home and OEM versions of Windows XP from disks.

How-To: Find Windows XP Product Key from the Windows XP CD:

1) Insert Windows XP cd into a working computer.
2) Exit the Autorun introduction.
3) Open “My Computer”
4) Right Click on the Windows XP cd-rom drive and select explore.
5) Open the USWXP32P_ZX folder. (It may be as a hidden folder. If you cannot locate the folder, you may also search for unattend.txt and mark “Search Hidden Files”.)
6) Open the sysprep folder.
7) Open unattend.txt

Your CD’s product key is contained within the unattend.txt file.


OR


VIDEO TO EXTRACT KEY FROM XP CD


onethanx@aol.com

Monday, February 2, 2009

ѕтєρѕ тσ ¢ℓєαη ιηѕтαℓℓ χρ

0 comments
Here are the steps For clean installing Xp of almost any service packs : :

Steps to Clean Install Xp


you can now boot the computer and follow the on screen prompts.
Have your Product Key available, typical install is around 30 minutes. If setup seems to
hang, wait at least 10 minutes + before restarting system.
You should experience
momentary screen blackouts.


1:Power on the computer. Press the Pause/Break key as soon as you see
text on the screen. [If you currently are running in an OS of any flavor,
insert XP CD and restart computer. Skip to #3 if system is configured
to boot from CD.]


2. Insert XP CD into CD drive. Press ENTER to resume booting from the XP CD.
(BIOS must support booting from CD and boot order must be set so CD
boots before hard drive. If computer does not support booting from CD
go to 2a for floppy install).

2a. Floppy install: Boot from Win98/Me/Special XP install floppy
disk with smartdrv.exe added to the boot disk or the Win XP set
of 6 floppy disks.

3. Look for message "booting from CD" usually located at the bottom of
the screen. If you have a factory splash screen, press ESC to unload
it.


4. Press any Key when you see the prompt to "Press Any Key"


5. Setup will start copying files, if you need to install any third
- party or RAID drivers press F6 at this time. the copying of files
can take awhile.You can screen at the bottom files being copied....

6. Next you will get the option to repair or enter setup, choose to
enter setup. Press ENTER.

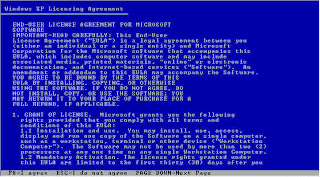
7. Press F8 if you agree to the license.

8. Setup will scan for previous Windows installations

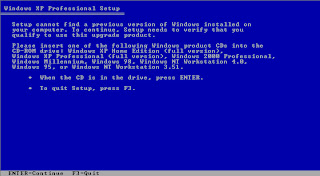
9. If you are using the upgrade version of XP on a computer without
any version of Windows currently installed, this is where you will
replace the XP CD with your qualifying CD, XP setup will scan the
qualifying CD and instruct you to replace it with the XP CD to continue
XP setup; otherwise, you will not see this screen. Clean install
qualifying media can be any of the following Win NT3.51, 4.0, 2000,
Win 95, 98, Me.

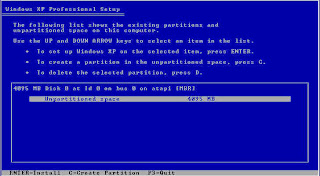
10. Choose the location to install.

10a If this is a clean hard drive, you can choose to create a
partition in the un-partitioned space. At this point, you can allow
Setup to use all the space or set a size for the partition.

10b If the hard drive or partition has a previous installation of
XP you want to remove, choose to delete the partition by pressing
"D". You will then be prompted to create a new partition in the
empty space. This will remove all data from the delete space.

10c If you intend to use multiple partitions or dual boot, this is
where you specify the size of the boot partition and or setup
location for XP. If you are planning to dual boot XP, I would
create a small 100 meg DOS partition for the first primary partition,
then an 8 to 10 gig partition for XP. You can partition and format
the remaining space after XP is setup from Disk Manager. If you do not
intend to dual boot, you can either use all the un-partitioned space or create an 8 to 10 gig partition for XP and leave the rest free to
partition later.

Note: If a fat32 partition larger than 32 gigabyte is desired, the
hard drive or partition will need to be created before running XP
setup. XP will not create a fat 32 partition larger than 32 gig, but
will support one previously created.

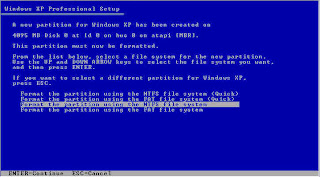
11. Choose the file system from this screen. If dual booting and you
created the small 100 meg partition, make it a fat partition. NTFS is
configured at the optimal file size during the initial setup.

12. If you have more that one partition or hard drive on your system,
make sure you are formatting the correct partition/drive.

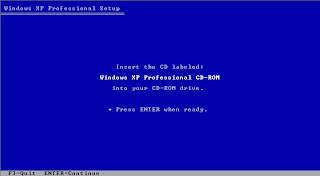
13. This is where you reinsert the XP Pro Upgrade CD.

14. Press ENTER to continue.

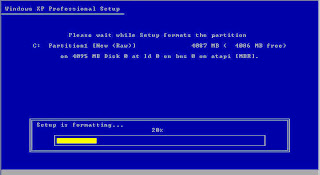
14. Setup will show a progress box and reboot when copying files is
complete.

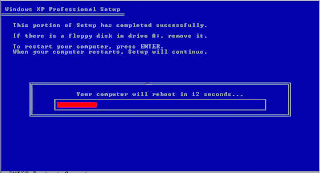
15. When you see the "Press any Key to Reboot" do not Press any Key.
If CD boots anyway, remove CD and reboot.

16. From this point, you will follow the on screen prompts.

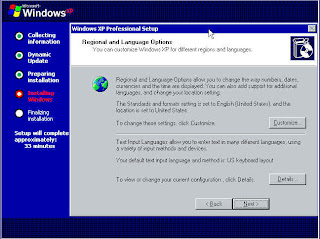
17. If you live outside the US, you will probably need to modify the
default settings.

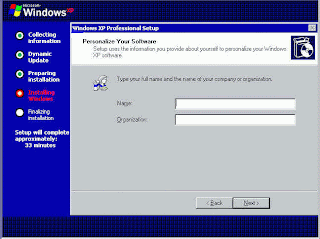
18. Personalize your XP Enter your Name and Organization.

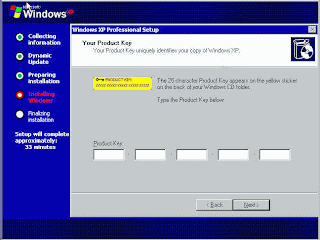
19. Enter the Product Key. The Key is located on the back of the CD folder
in the Retail versions and on a holographic label with the OEM
versions purchased with a piece of hardware. Write this key down and
secure it in a safe place in case the original is misplaced destroyed
through natural causes or stupidity.

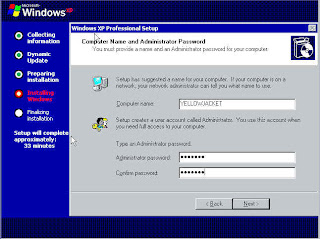
20. Choose a name for the computer, this should be a unique name for
the computer, especially if it is to be connected to a network. In Pro,
you are given the option of creating a password or leaving it blank.

21. Set your Time Zone and Time and Date.

22. Setup will scan for network.

23. If detected you will have the choice to choose a typical
configuration or custom. Choose typical if you are unsure.

24. For home you will choose your workgroup, if a network is already
established and you intend to connect to it, use the existing
workgroup name, otherwise, I suggest using the default.

25. For Pro, the same goes for Pro as suggested for Home, but you will
have the choice to join a Domain, if you do not have a Domain or do
not know leave blank.

26. Setup will continue and reboot when completed ignore the "Press
Any Key".

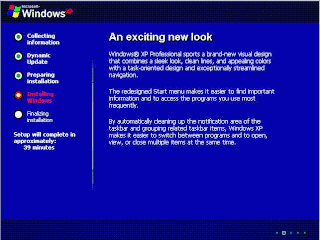
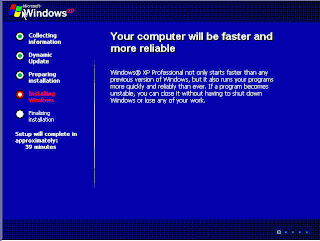
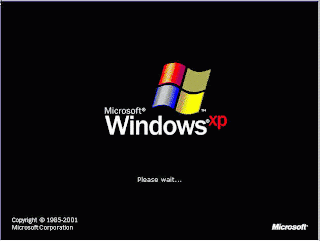
27. The loading XP window will now display after reboot.

Note: All XP SP2 versions now show the same XP loading screen. Home
or Pro are no longer listed.

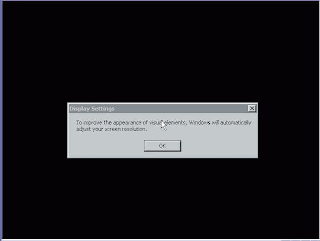
28. You will see a change display settings, say yes and accept the
setting if you can see the screen after accepting.

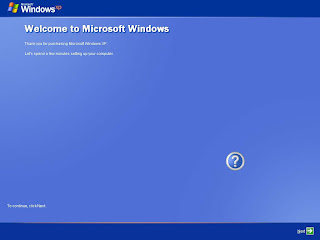
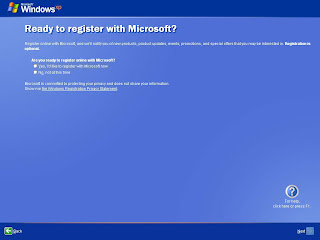
29. You will see a welcome screen, press next
and unfortunately you
have to wait for the dialog to finish.

30. Set up your internet or network connection Or skip


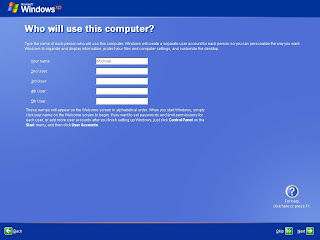
31. Setup users screen. Set at least one user for yourself or the person
that will be using the computer.

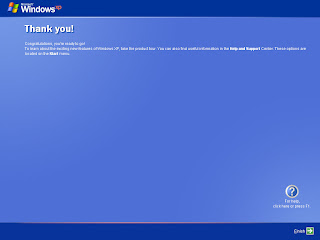
32. Thank You

33. Logon to XP and apply Service Pack and Critical updates from Windows
Update before installing any software or hardware.
34. Install your anti-virus software.

35. Install all applications and setup your email.

36. Restore from Files and Settings transfer after reinstalling all
applications.


NOTE : :

Even though XP will recognize most of the hardware and peripherals the clean install does NOT furnish all the latest drivers. Check The BOOT settings before you start Formatting the system .............

Thank U ..expecting The best regards..........


onethanx@aol.com

Sunday, February 1, 2009

нσω тσ тα¢к χρ тσ ѕтαят ιη α ¢ℓєαη вσσт мσ∂є

0 comments
IMPLEMENT AS SAID :


Its a simple and easy technique to be followed to make XP run in a clean Boot..
If your computer is not starting normally, or if you receive errors when you start your computer that you cannot identify, you could consider performing a "clean boot." This operation starts the computer by using a minimal set of drivers and startup programs. This can help you troubleshoot the problem.
This post narrates how to configure Windows XP to start by using a clean boot and then how to return Windows XP to a Normal startup type.

There are two methods to start Windows XP by using a clean boot:
  • Method 1: Use the Guided Help
  • Method 2: Manually starting XP with a clean boot (advanced user only)
Start with the first method. If it does not work and you are comfortable trying a more advanced method, try the second.
You can use Guided Help to clean-boot your computer or to restore your computer from a clean-boot state. Guided Help can guide you through the steps, or can automatically perform the steps for you.

Notice that the actions that Guided Help performs can be undone after Guided Help is finished. To undo the actions, run Guided Help again. When you are prompted by Guided Help, click the Normal startup option or the Clean boot option.

http://support.microsoft.com/?scid=aw;en-us;310353&eula=1

If the guided tour helped you start in a clean-boot state, you are finished with this article. If you have to return your computer to a normal startup state, go to "Steps to configure Windows to use a Normal startup state." If the guided tour did not help, you can try method 2 if you are comfortable trying an advanced method. If you are not comfortable with the advanced steps, go to the "Next Steps" section.
To manually start Windows XP with a clean boot, follow these steps:

Step 1: Start the System Configuration Utility

  1. Click Start, click Run, type msconfig, and then click OK.
  2. The System Configuration Utility dialog box is displayed.

Step 2: Configure selective startup options

  1. In the System Configuration Utility dialog box, click the General tab, and then click Selective Startup.
  2. Click to clear the Process SYSTEM.INI File check box.
  3. Click to clear the Process WIN.INI File check box.
  4. Click to clear the Load Startup Items check box. Verify that Load System Services and Use Original BOOT.INI are checked.
  5. Click the Services tab.
  6. Click to select the Hide All Microsoft Services check box.
  7. Click Disable All, and then click OK.
  8. When you are prompted, click Restart to restart the computer.


Step 3: Log on to Windows

  1. If you are prompted, log on to Windows.
  2. When you receive the following message, click to select the Don't show this message or launch the System Configuration Utility when Windows start check box, and then click OK

    Notes
    • You have used the System Configuration Utility to make changes to the way Windows starts.
    • The System Configuration Utility is currently in Diagnostic or Selective Startup mode, causing this message to be displayed and the utility to run every time Windows starts.
    • Choose the Normal Startup mode on the General tab to start Windows normally and undo the changes you made using the System Configuration Utility.

Step 4: Optional step to disable features

If the clean boot fixed the error, you do not have to perform this step.

NOTE :: Important If your problem is not fixed and you do have to follow this step, it permanently removes all restore points from your computer. The System Restore feature uses restore points to restore your computer to an earlier state. If you remove the restore points, you can no longer restore Windows to an earlier state.

This step temporarily disables Microsoft features such as Plug and Play, networking, event logging, and error reporting.
  1. Click Start, click Run, type msconfig, and then click OK.
    The System Configuration Utility dialog box is displayed.
  2. Click the General tab, click to clear the Load System Services check box, and then click OK.
  3. When you are prompted, click Restart to restart the computer.
If these steps helped you start your computer in a clean-boot state, you are finished. If these steps did not help, go to the “Next Steps” section. If you have to return your computer to a normal startup state, go to “Steps to configure Windows to use a Normal startup state”.

Steps to configure Windows to use a Normal startup state ::

After you used the clean boot to resolve your problem, you can follow these steps to configure Windows XP to start normally.
  1. Click Start, and then click Run.
  2. Type msconfig, and then click OK.
    The System Configuration Utility dialog box is displayed.
  3. Click the General tab, click Normal Startup - load all device drivers and services, and then click OK.
  4. When you are prompted, click Restart to restart the computer.

LIVE ACTIVITY

Followers

Locations of visitors to this page

Copyright 2008 All Rights Reserved Revolution Two Church theme by Brian Gardner Converted into Blogger Template by Bloganol dot com